
Water and mold damage is never a fun topic and most assume that water and mold damage only occurs in dilapidated homes. However, in regions like the Kansas City metro area, we see water and mold damage in all types homes, including high-end luxury homes that are commonly found in Mission Hills, Overland Park, Leawood, Loch Lloyd, Lee’s Summit, Parkville, The Plaza and more.
Story of Local KC Luxury Home Suffers Extreme Water and Mold Damage in 6 Short Months
Mold shows no preference. Even in luxury homes we find that water and mold damage is most often caused by stucco damage, poor building practices and concrete roofs. In this project, we will take a look at a sizable water and mold damage job. This was a vacant luxury home that suffered excessive water damage due to frozen pipes that were not found for an extended period of time. As a result, over 80% of the home had to be gutted, treated and cleaned. In this video, our owner Ben Fetzer will be walking you thru this project and explain the mold remediation process to restore this house to a healthy and safe condition.
Video Transcript:
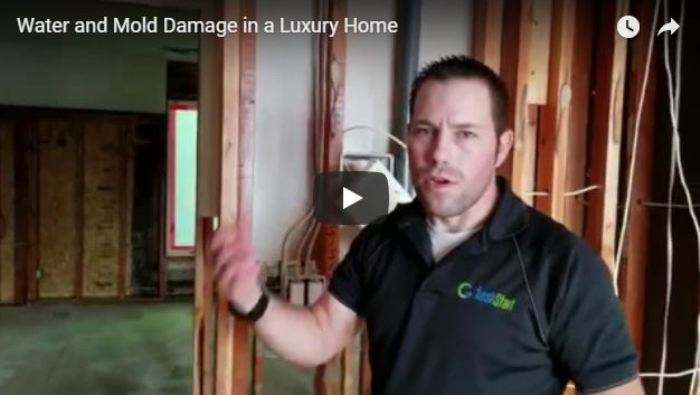
Ben Fetzer with Fresh Start Restoration. We are going to walk you through a large project that we have just completed. Tomorrow we do the post-test…with another company. We’re going to use a third-party company to inspect and take air samples of this project that we’ve just completed. It’s a large house, multiple water sources as far as the water and mold damage. This is one of them. This is on the third level. There was damage here, mold here, and the contact person did say that this was the area they knew of as far as a water leak. It’s just the basic plumbing line. They believe that it froze and then caused a lot of water damage, prior to being winterized because the home was vacant. If situations such as this do arise in the place you live in (like Rocklin), the troubled party might just have to look at a Rocklin Property Damage Restoration company to help them out!
Upstairs Bedrooms: Mold Damage from a Frozen Pipe
So this room is one of the bedrooms and mold was not terrible in this room. You can tell though, we’ve taken down a lot of drywall, the majority of it as for the walls. Water came from low, mold wicked up the walls. And created mold quite a ways up the wall maybe halfway or so. But we’ve taken the drywall all the way to the ceiling. You can see the bathroom is got one wall taken out, but the other areas like the tub and the floor and the vanity and this one is is fine.
You might also know how shiny all these two by fours are. That’s because of a antimicrobial coating has been applied, which does resist mold as well as cleans everything. And you see how clean that is. It’s as clean as a piece of plastic as far as being dust free. So it gives all of these surfaces a brand new finish so that there’s no more dust that’s able to be moved through the air from the surface. The surfaces are now dust free. Keep on walking.
Water and Mold Damage from Exterior Stucco Damage
Another room here. Notice we’ve got some exterior water damage and that did have something to do with the mold in this room. Failure on the siding there and that is a stucco siding. And this wood was totally rotten as far as this plywood sheeting. So we made a cut with this small tool. We just got rid of all that rotten wood, took forever. It’s really tedious. You can still see the two by six there on the bottom plate is going to need a little bit of repair from a contractor. And we are going to keep going through this other room.
Here’s a bathroom that we did some work on. You can see we did take the vanity out of it. It had a leak somewhere in here, I believe and definitely was affected with mold. That’s the attic which was not affected. Just keep on going through the rest of this main upper level.
Flex Vents Required Replacement
Notice the ceiling. We had some water damage and we wanted to inspect that upper level. There was no attic access. So this was what we used for attic access. HVAC lines were cleaned. This has got, used to have flex lines. It does have a separate furnace for this top-level, which was fed and supplied by flex line. Those have all been thrown away. The main trunk has been sealed off. The main trunk has been cleaned. And the main trunk which did contain insulation inside of the actual steel. That also was coated with an HVAC coating so that it’s not producing dust and the air can move through that line a lot faster and easier without being disturbed by debris. So, common into another room.
Roof Leak
This room had a small amount of mold in here. You can see this is an area where there was a lot of damage from the siding and we have a roof leak. So we had some mold as a result of a roof leaking, siding issues, exterior issues. If you noticed we tapped the window, so when we spray the coating none of the over-spray can get on the glass. Everything back here was unaffected and in good shape?
Head on down. Notice that the handrail has just got a temporary rail right now. That whole piece had mold at the bottom, at least down there at the end. So that’s why this particular piece was removed and the spindles and the actual rail itself. So this has all been wiped down actually just today. Everything is ready for inspection. As we said, it’s been wiped all of the raw woods have the antimicrobial coating. And we’re ready to get our clearance letter. Hopefully soon and give this back to the owner.
Main Level: Water and Mold Damage from Multiple Water Sources
So this is the main level. You can see we still have equipment in position. It’s just been turned off so we can take our test. This was really bad. This is the dining room. It had a tremendous amount of custom woodwork. You can still see the remnants that were unaffected by any mold. This whole room and this main level looked a lot like this. Lots of custom beams, crown molding and trim and paneling, all kinds of stuff. Let’s actually just go into that room and make a big circle.
This was an office and it sustained a small amount of mold from the window above. So we saw the damage in that bedroom right above us. This is the same basic area as far as where the water was coming in. It was affected by the same water source. That was it, it was all up in the ceiling and upper wall. The rest of the room was in good shape. We did take some of that part to expose that wall there, make sure it wasn’t affected.
Dining Room: Water and Mold Damage from Stucco and Upstairs Water Damage
And now onto the dining room. So you see under the window, more exterior siding failure. Above and below the window, which is rotten sheeting. Quite a bit of mold in this sub-floor and floor joists. That was all treated, cleaned multiple times with a peroxide mold remover. It still has some staining, but it’s been thoroughly cleaned. Go thru the rest of this area.
Laundry Room & Hallway: Water and Mold Damage from Frozen Pipe & Upstairs Water Damage
So this area was the laundry room. Right in this hallway here. This is the plumbing where one of the leaks came from, up in this area. So you can imagine water flowing into these two rooms, hallway, going into the laundry room, into the kitchen. And so this is the laundry room was affected by that leak. I think that’s probably the only reason that it was a molding was from that. This leak here. On into this room.
Kitchen: water and Mold Damage Hidden Behind Cabinets & Under Hardwood Floor
Again, you noticed the shiny walls. This is the kitchen. This had nice cabinets, counter-tops, bunch of fancy furnishings. Had a cabinets along that wall and it was all moldy. So it all came up and was discarded. Had an island you can see. The gas line has been capped. The floor right here had hardwood, all through this main level. This was put in by us just to basically patch the hole because when this hardwood was affected by the water, so was the actual subfloor, the sub-floor had a bow in it.
That would go up in the center of these four by eight sheet afoot. So imagine this floor blowing up about a foot, because of water. That’s what was happening right here. So that plywood was taken out and we just put a new piece in temporarily. The contractor can fix it in any way he wants to. This is kind of a hearth room. You can see the custom stone that was left in place. There isn’t mold behind the fireplace, but we did get the rest of this room. So moving onto the living room.
Living Room: Hidden Mold Behind Custom Woodwork
Quite a bit of damage in this room too. The ceiling was pretty bad. That wall was not too bad, but it was mostly on the floor that had some mold. That did have custom built-in bookshelves. Those came out. The bottom of them were moldy but the rest of it was really not. And you can see where we’ve been running our negative air out this window. I just sort of balled up this piece of plastic for tonight and close the window outside. So no air could come in through that tubing. And we’ll just move on into the master bedroom.
Master Bedroom & Bathroom: Minimal water and Mold Damage
There’s a little hall bath unaffected by the mold. You can tell we did go ahead and remove all of the baseboard in these areas like this bathroom. Just start with the floor to see if any mold had grown up the wall and this room has not been affected nor has this hallway. Going into the master bedroom. This wall was taken down so we could expose the backside of this fireplace and figure out what’s going on as far as contamination. Rest of the room not affected, but it has been sanitized by damp wiping and HEPA vacuuming.
Master bathroom. Pretty much unaffected here. I did pull the front of this little cabinet off, make sure that there was no mold underneath. Master bath right here, the toilet area, totally different water source somewhere in this area, must have been related to the toilet because we did have some mold at least right around in here. And we took the whole thing because I wanted to see how much mold there was. A little bit of mold here. That’s probably due, just using the shower honestly. The cabinets have been inspected by cutting a hole in the bottom of the cabinet and exposing the floor as well as the bottom of the cabinet. They’re fine and haven’t been affected. Baseboards removed under here.
Frozen Pipe Burst: Source of Water Damage in Basement
Here is another really interesting spot. We had…trying to find if its been taken out. I think it was. A bulge, which is documented, but this…..there it is, get a closeup of that. So that’s a frozen pipe. That’s how it expands when it freezes and it just cracks the edge, spews water out. Somehow, this was frozen and they winterized and shut off the water. It must have been really close to when this broke. Because there was very little water damage and mold in this bathroom. A little bit on the floor, maybe a little bit…and it did affect the basement.
Yes. But this was, this could have destroyed this entire master bath and bed and office had this been actually flowing when the water was on. So this was a small amount of damage for such a serious break in this pipe. So. But this did flow down and affect the basement to some degree. But it seemed like the water just went down and it wasn’t a huge amount. Speaking of basement, let’s go down and see it next.
Basement: Mold Caused from Upstairs Water Damage
Ok, stairway going to the basement. Lots of water and mold damage. Not a ton here. But we did have siding issues again, that affected this area and created mold in this area. We pulled the ceiling. I think that was the only area that really has some siding related issue. There was mold in other spots. But, lets go to the basement. So this is where most of the tremendous contamination came from. This was a basement.
And we have spent huge amounts of time down here as well as resources getting mold out. Starting with content that was left, carpet throughout. Had custom woodwork as well in spots. To refinish all the woodwork, we had to reach out to someone like a Contents Restoration Company. Also, this place was a full-blown theater with a riser for the seating. So, it took maybe two dumpsters just to get the basement gutted. And it was not fun. Lots of hard work, lots of trips to the dumpster. In fact, we even thought of getting in touch with roll off dumpster rentals to ease our workload. Eventually, we did it on our own. And, it was indeed a very, very tedious, slow process to get this basement to the point where it is now, which is safe. You can see it’s totally gutted. We have cleaned the HVAC lines down here as well as well as the two systems. So, and the coating has been applied, so everything is good now, but we’ll go over some of the different areas and what we found.
Water Saturated & Mold-Infested
So we also did take the wood bottom plate in the basement. We wanted to know the condition of that board on the bottom side. So I did remove this bottom plate from this wall. Turned it over and it wasn’t moldy, it’s a treated lumber. So it really had gotten moldy. Over here we did the same thing in that section that was the worst as far as staining on the bottom plate. And we took it out and didn’t have mold under it as well. This is the main room down here, it’s just some kind of room going out to the walkout basement.
That was an unfinished, a utility room around the HVAC system. And we can go this way if you want. So this was unfinished when we started and we’ve put a lot of time underneath those stairs, getting the wood clean underneath there because it was really bad. We’ve had the dehumidifier blowing under there to keep it dry for a week. This is just a workbench that was here. It’s all been cleaned and sealed. There is not a whole lot to talk about in this room other than this is a utility area, storage area, unfinished area.
Excessive Moisture: Severe water and Mold Damage, Rusted Lights Fixtures and Steal
So down at the end of this basement is where the worst of the mold was. We’ll go look at it. This was plenty bad. Everything was bad, but the wet as far as the moisture, there was a ton of moisture down here. A kitchenette was in this area and a fireplace there, and insert that we took out . A bathroom is here. This little hallway thing was just an access hallway for your system in you’re a theater room. So they had a big fancy theater speakers and such. And that’s how you and plug them in and set them up. A full basement bathroom. That’s, it’s all been gutted.
And this is where a lot of the water damage and mold was. Take a lot of time running these dehumidifiers down on this end just to get the humidity dry, or lowered and get the wood dry. That took about a week before we could actually get the moisture content out of the wood and then get the humidity under control. So this has been cleaned multiple times, multiple applications of peroxide mold remover, lots of vacuuming, lots of agitation, and it’s just been scrubbed and just tediously cleaned so, painfully cleaned.
You can see the rust on the light. That’s a good sign of how much moisture we’ve been dealing with. I’m positive that contractor will throw that away and there’ll be a lot more work done as far as just changing stuff out. But we have not taken those out. And we’ve just very little, you know, addressing electrical wires.
Kitchenette Was Unsalvagable
We’ve had to obviously unhook some stoves. Both of the kitchens had stoves with 220 wiring and we had to deal with that as far as unhooking it safely. Containing it until it can be hooked up to a new unit. Anyway, this is the basement, it was really bad. It’s taken a huge effort to get it to the place it is now. More wood rot, some over there and some here, quite a bit in all honesty. A section here and down over here on the other side of this window. A great big section of failure somewhere in this stucco, so all that sheeting has been pulled off and it’s going to need a pretty serious repair, as far as the stucco.
Again, the windows had been covered up so we don’t over-spray on them. The bulkheads were really difficult. All these wires, this is mostly speaker wire. That’s just be left in place. We’ve sprayed it with the coating, gotten up into these bulkheads. Put a lot of time into that. I did that myself to make sure we spray the coding on all the crevices. Pocket doors were here at one time. You can still see some of the hardware for that. I am sure all of that will be redone with new hardware. That is about all I can think about in the basement. So that’s our project!
Ben Fetzer, Fresh Start Restoration, and thanks for watching. And this is our massive project. If you need anything as far as mold is concerned? MoldKansasCity.com. Fresh Start Restoration. Have a good day!